Mar 13, 2026

These Pastel Deviled Eggs are not only delicious, they brighten your Easter table, too!
Prep Time: 30 mins • Cook Time: 10 mins • Additional Time: 50 mins • Makes: 24 eggs
INGREDIENTS
- 12 large hard boiled eggs, peeled
- 1/3 cup mayonnaise
- 1 tablespoon Dijon mustard
- Salt and White Pepper to taste
- 4 drops red food coloring, or desired amount
- 4 drops blue food coloring, or desired amount
- 4 drops green food coloring, or desired amount
- 3 cups water, divided, or as needed
DIRECTIONS
- Halve the boiled eggs, remove the yolks, and place the yolks in a separate bowl. Cover and refrigerate the yolks while dying the egg whites.
- Place red, blue, and green food coloring into 3 different bowls and add about 1 cup water to each bowl. Steep 8 egg white halves in each bowl, tinting the egg whites pink, light blue, and green. If color is too pale, add more food coloring to bowls. Drain colored egg whites on paper towels.
- Mash the egg yolks with a fork until smooth. Add mayonnaise, Dijon mustard, salt, and white pepper. Mix until well combined and creamy.
- Place the egg whites on a serving tray. Spoon or pipe the egg yolk mixture into the egg whites.
NOTE: Try using Neon Food Colouring for even more vibrant colour.
Mar 13, 2026
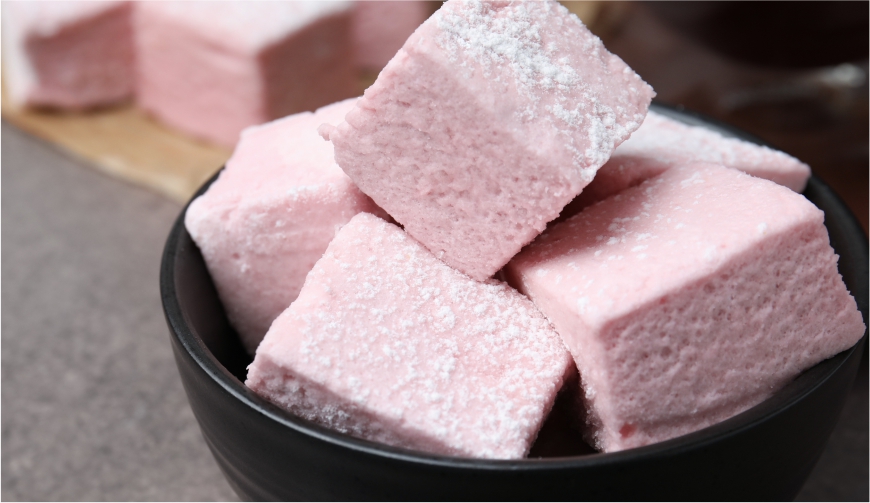
These billowy, soft strawberry and champagne flavoured marshmallows are a delicious adult treat for Easter, or anytime!
Prep Time: 30 mins • Set Time: 4 hours • Total Time: 4 hours 30 mins • Makes: 24 marshmallows
INGREDIENTS
- 1/4 cup powdered sugar
- 1/4 cup cornstarch
- 2 tablespoons strawberry jello powder
- 3 packages unflavored gelatin
- 1/2 cup champagne (or Prosecco)
- 2 tablespoons strawberry jello powder
- 1 1/2 cups sugar
- 1/2 cup corn syrup
- 1/2 cup water
DIRECTIONS
- Line an 8×8 inch pan with parchment paper and set aside.
- In a small bowl, combine the powdered sugar, cornstarch, and 2 tablespoons of jello powder. Sprinkle half the mixture to cover the bottom and sides of the parchment-lined pan.
- Add gelatin, champagne, and remaining 2 tablespoons of jello powder into a large bowl; set aside.
- In a medium saucepan, combine sugar, corn syrup, and water. Cover and heat over medium high heat for 4-5 minutes.
- Uncover, and attach a candy thermometer to the side of the saucepan (make sure the tip of the thermometer is in the liquid but not touching the bottom of the saucepan). Heat until the mixture reaches 240°F (about 5-10 minutes). Remove from heat. Using an electric mixer, or a stand mixer, begin whisking the gelatin mixture.
- Slowly pour the corn syrup mixture into the gelatin mixture while whisking. Continue whisking for about 12 minutes until combined and fluffy.
- Spread the marshmallow mixture into the prepared pan.
- Sprinkle remaining powdered sugar mixture over top of the marshmallow mixture.
- Let set for 4 hours.
- Using a greased knife, cut into cubes, or cut into fun shapes, such as bunnies, or chicks for Easter.
Mar 13, 2026

This rich, creamy cocktail is made from homemade advocaat. The custard-like richness of advocaat blends perfectly with Vanilla Vodka, White Crème de Cacao, and Bailey’s Irish Cream for a perfect Easter cocktail.
INGREDIENTS
Homemade Advocaat
- 10 fresh egg yolks
- 1/2 teaspoon salt
- 1 1/3 cups sugar
- 1 2/3 cups brandy
- 2 teaspoons vanilla extract
For the Crème Egg Cocktail
- 1/4 cup vanilla vodka
- 2 Tablespoons homemade advocaat
- 2 Tablespoons White Crème de Cacao
- 2 Tablespoons Bailey’s Irish Cream
- 1 Tablespoon cream (Half & Half)
- Cadbury’s Crème Egg, halved
- Toothpick
DIRECTIONS
- Fill a medium saucepan with 1 inch of water and bring to a simmer over high heat. Reduce to low. Meanwhile, in a large bowl, whisk egg yolks with salt, and sugar until sugar is dissolved and mixture falls from whisk in creamy pale yellow ribbons, about 4 minutes. Whisking continuously, pour in brandy.
- Place bowl over simmering water and cook, whisking continuously, until mixture is thick enough to form a coat on the back of a spoon, about 8 minutes total. (If using thermometer, mixture should reach at least 130°F).
- Remove from heat and whisk in vanilla. Pour into a lidded glass container and refrigerate for a minimum of 6 hours before serving. Store in the refrigerator for up to 1 month.
To make the Crème Egg Cocktail
- Combine all ingredients into a shaker filled with ice. Shake vigorously until chilled. Strain into a chilled martini or cocktail glass. Garnish with a halved Cadbury Crème Egg.
Mar 13, 2026

These Buttercream Chick Cupcakes are an adorable, sweet addition for Easter celebrations!
Prep Time: 20 mins • Cook Time: 20 mins • Time to Decorate: 30 mins • Total Time: 1 hour 10 mins • Makes: 24 Cupcakes
INGREDIENTS
- 1 box yellow cake mix, plus ingredients to prepare mix
- 3/4 cup pasteurized liquid egg whites
- 6 cups powdered sugar
- 1/2 teaspoon salt
- 6 sticks unsalted butter (24 oz.), softened at room temperature
- 2 Tablespoons vanilla extract
- Assorted gel food coloring
DIRECTIONS
- Prepare and bake cupcakes according to cake mix directions.
- Allow the cupcakes to cool completely before frosting.
- Add the egg whites, powdered sugar, and salt to a large bowl. Using an electric mixer, mix on low speed until the sugar is moistened. Scrape down the sides and bottom of the bowl with a spatula, then turn the mixer to medium speed, and beat for 5 minutes.
- Turn the mixer to medium-low and add the softened room temperature butter, 2-3 tablespoons at a time. Once all of the butter is incorporated, add the vanilla extract and mix to combine.
- Scrape down the bottom and sides once more. Turn the speed to medium and beat the buttercream for 10 minutes, or until the frosting becomes a light and creamy texture.
- Add drops of yellow gel food colouring to the frosting; adding until you reach the shade of yellow you desire.
- Fit a piping bag with a large round tip, or a plastic coupler. Fill the bag with yellow buttercream frosting.Pipe a large round dollop of frosting that extends almost to the outside of the cupcake. Then pipe a second, smaller dollop right on top to form the chick’s head.
- Once all of the chick bodies are piped, take the leftover yellow frosting and add red food colouring to make it orange. Fit a second piping bag with a small round tip. Fill the bag with the orange buttercream frosting. Make two “W” shapes at the base of each chick’s body for the feet. Pipe an orange beak on the front of each chick’s head.
- Add two sprinkles, or mini chocolate chips, for eyes. You could also use melted chocolate for the eyes.
The cupcakes can be stored in an airtight container at room temperature for 2-3 days, or in the refrigerator for up to a week. Allow them to come to room temperature if they have been refrigerated for the best taste and texture.
Feb 18, 2026

Join us on
Sunday, March 8, 2026
for the
Lindo’s to Lindo’s
10K Run and 4-Mile Walk
The Lindo’s to Lindo’s event goes beyond a mere race; it’s a community-driven initiative aimed at raising awareness about diabetes, promoting a healthy lifestyle, and supporting those in need.
We’re inviting the whole island to hit the streets, have fun, and turn every step into community impact. A favourite on the calendar since 1999, the annual race and walk reinforces that “Every Step Counts” in building a healthier Bermuda.
More event details and signup at racedayworld.com
Part of the race proceeds to support the
Bermuda Diabetes Association
Goodie bags and t-shirts available at Saturday number pickup for first 1,000 participants.
The Lindo’s to Lindo’s event represents the partnership between Lindo’s and the Bermuda Diabetes Association. The road event is organised by the Mid Atlantic Athletic Club, sanctioned by Bermuda National Athletics Association. The event is further supported by Allshores, Barritt’s, Butterfield and Vallis, BGA, Europa Imports, Sompo, and parking at the beginning of the event is kindly provided by Warwick Academy.
Feb 16, 2026

By Stephanie Simons,
Head Pharmacist,
Lindo’s Pharmacy in Devonshire
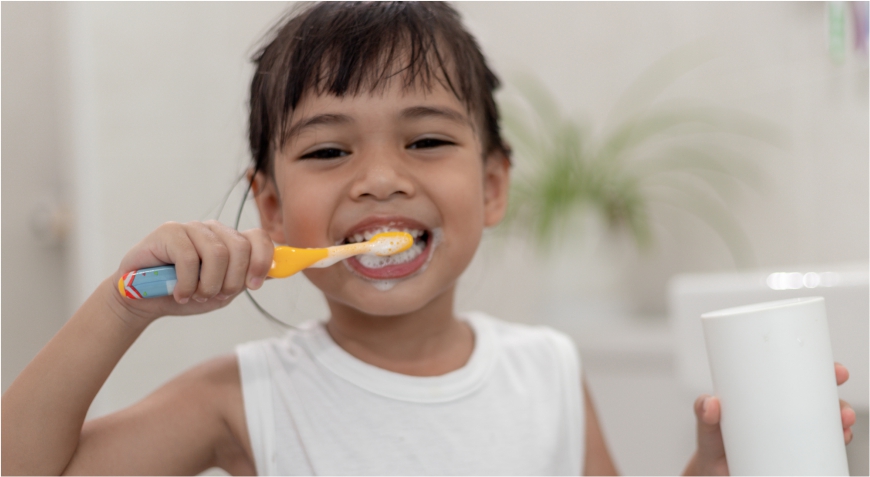
February is Children’s Dental Health Month. Dentists recommend that you start brushing your child’s teeth – very gently, obviously – as soon as the first milk tooth pops through the skin. Usually at about six months.
But some experts believe you can start the process even earlier – on the grounds that good oral hygiene doesn’t need teeth. Whatever you feel on that subject, here’s some suggestions and tips for you to chew over…
INFANTS
There is a school of thought that says that even before your baby gets his or her first milk tooth, you should wipe their gums gently twice a day – either with a soft (clean!) cloth, a bit of gauze or a ‘baby finger toothbrush’ (a bristled silicone sheath that slips over your finger – and looks a bit like a spiky Dalek). No need for toothpaste at this stage – water is fine.
What’s the point of this, I hear you ask? Well, wiping the gums gets rid of any lingering bacteria from leftover milk or formula. It helps your baby get used to the brushing process. And it may also feel good, if they are teething. (And on that front, we can help, too: we stock several cooling gels including Orajel and Bonjela, to soothe your little one’s discomfort.)
6 MONTHS – 3 YEARS
Once baby’s first tooth does appear, you can move on to proper brushing. You’ll need a baby toothbrush – which we stock (and which needs to be replaced every 3-4 months). Something with a small head – to fit in their small mouth – rounded edges and soft bristles. Oh, and a handle that YOU find comfortable – because you’ll be doing the driving.
Use a tiny smear of children’s toothpaste – a ‘rice-sized’ blob, of a brand that offers at least 1000 ppm of fluoride. Fluoride is important because it helps to protect against decay and strengthen the brand-new enamel of those tiny teeth, while they are at their most vulnerable and exposed.
It may seem obvious, but let’s say it anyway: don’t let your child eat the toothpaste. Fluoride may be great for milk teeth, but it’s not great for tummies. We also stock fluoride-free toothpaste for small children like Tom’s and Punch and Judy, so that you don’t have to worry the toothpaste being sucked in and swallowed.
Remember the dentist’s golden rule: 2-2-2 (which applies to grown-ups, too). Brush TWICE a day (with the second brushing coming just before bedtime), for TWO minutes a time. And visit the dentist TWICE a year.
3-6 YEARS
Carry on with the 2-2-2 rule and brush at least twice a day – for two minutes, no skimping! – with one of those sessions occurring just before bed.
By the age of three, your child can probably handle an electric or battery-operated toothbrush – although the old-fashioned kind is just fine, too. If you do go electric, make sure it’s one recommended for children, with a soft bristled head. You don’t want an adult model which could be too powerful and inadvertently cause harm.
Whatever kind of toothbrush you’re using, start to encourage your child to brush their own teeth…under your watchful gaze. News flash: you’re STILL the toothbrush monitor and will be till they are seven.
Use a tiny bit more toothpaste on the brush – a pea-sized blob, rather than a rice-sized smear – of your preferred children’s fluoride brand. Most major brands stock fun versions for kids – like Crest Advanced Kid’s Fluoride Toothpaste, which comes in bubblegum flavour, and changes colour from blue to pink, to encourage longer brushing.
Remind them to spit, not rinse. Rinsing means all that helpful fluoride goes right down the drain, literally – and still no eating, despite the bubblegum taste! Continue to replace your child’s toothbrush (or toothbrush head) every 3-4 months.
Once he or she gets enough teeth so that some are starting to touch, you can introduce flossing. Again, you’ll have to be the designated flosser, so be sure to use a light touch.
We have a number of suitable dental flosses in store, so if you need help, just ask one of our pharmacists for advice.
7 YEARS AND UP
By now, your child should be able to brush his or her own teeth – though you will still need to keep an eye on proceedings, to make sure they don’t cut corners.
You’ll also need to start buying a higher fluoride toothpaste – 1350-1500 ppm – to protect against cavities. Flossing will become important, too; since teeth may start to get crowded.
If your child wants to try using a mouthwash, a non-alcohol version with fluoride is OK (though not for younger kids, who might swallow it). But remember not to use mouthwash AFTER toothbrushing. Like rinsing after brushing, this will undo the good work that your toothpaste is doing (the fluoride in mouthwash is no match, in terms of protection, for that in toothpaste). Perhaps try using it in between the morning and evening brushing sessions.
Stephanie Simons is the head pharmacist at Lindo’s Pharmacy in Devonshire. She earned her Bachelor of Science in Pharmacy at Massachusetts College of Pharmacy and has been practicing for over 20 years. She is a registered pharmacist with the Bermuda Pharmacy Council and is a member of the Bermuda Pharmaceutical Association.


